
Unity iOS ~ Xcode Build Pipeline Guide

Unity iOS ~ Xcode Build Pipeline Guide
Build Series (5 / 7)
- Unity Build Automation - fastlane
- Unity Build Automation - Build Pipeline & Addressable
- Unity Addressable Build Error Fix - Animator Not Running
- Unity Build Automation - Jenkins
- Unity iOS ~ Xcode Build Pipeline Guide
- Unity iOS - Xcode Code Signing Guide (Certificates & Provisioning Profile)
- Jenkins Build Pipeline - Plugin List

Table of Contents
About Unity iOS Build Process
About Xcode Project Structure (xcworkspace)
Unity iOS Build Post-processing Script & Xcode Configuration Automation
Unity iOS Build Process
---
title: Simple Flowchart from Unity iOS Build to .ipa Distribution
---
flowchart TD
    A[Unity Project Development] --> B[Unity Project iOS Build]
    B --> C[Generate xcworkspace - Xcode Project]
    C --> D[Build Xcode Project]
    D -->|Test Flight| E[Distribute .ipa to Testers only]
    D -->|App Center| F[Distribute .ipa for Dev, Alpha]
1. Unity Project iOS Build
- In Unity Project’s Build Settings, select the platform as “iOS”.
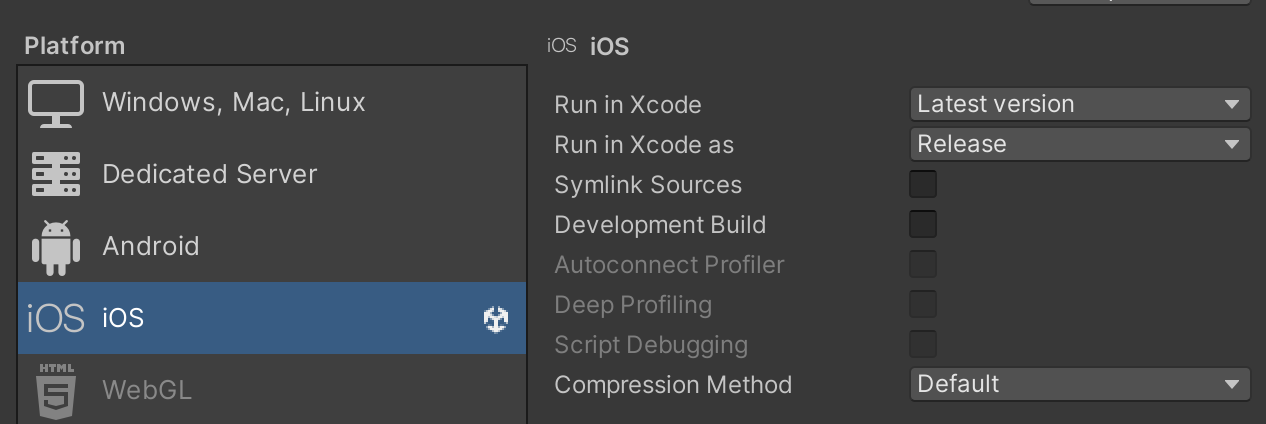
- Caution: It’s better not to manually touch the settings on the right; handle them in automation scripts instead. (However, you can select them when local build profiling is needed.)
- Enter the Bundle Identifier in Player Settings.
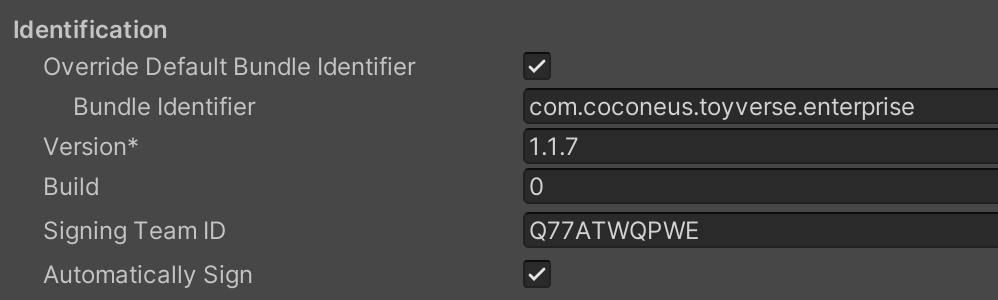
- Here, Bundle Identifier is a unique string identifying the app. It is used for updates and distribution.
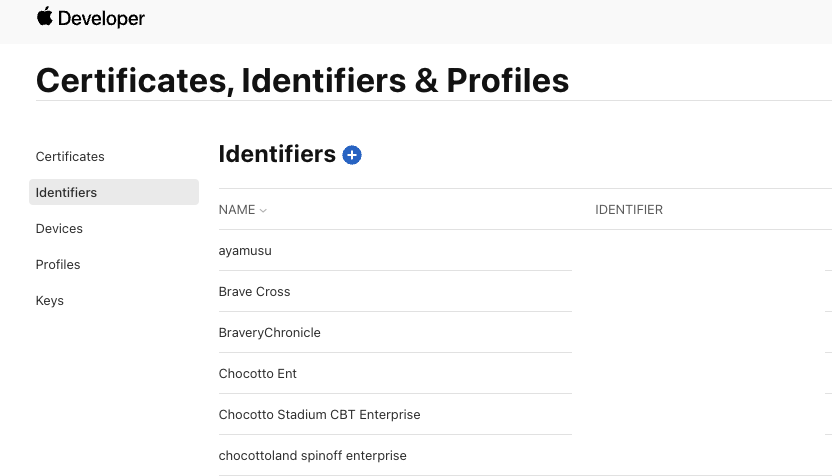
- iOS Bundle Identifiers can be created and managed in Apple Developer - Identifiers.
- Also, the Signing Team ID can be checked in the top right corner.

- Note that Version here refers to the actual App Version, which is different from the Resource Version when managing resources with Addressables.
- App Version is updated every time the build process is renewed (e.g., 1.1.0 -> 1.1.1).
- You can set Xcode Default Settings in Settings / Preferences - External Tools.

- If you check the Automatically Sign option here:
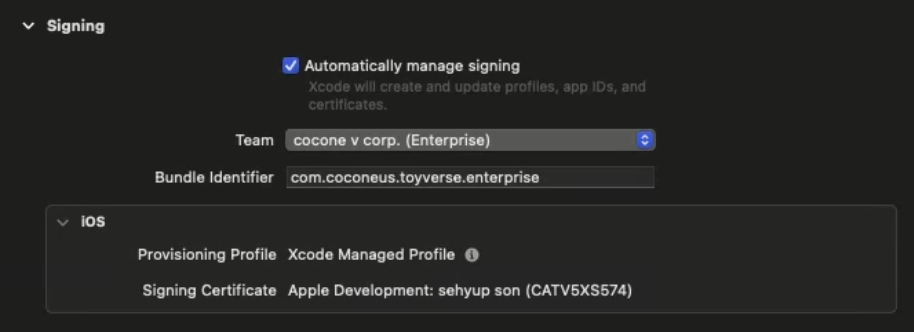
- In the Xcode Project’s Signing tab, “Automatically manage signing” becomes enabled, and the Bundle Identifier is set according to the entered Team ID (whether it’s enterprise or not).
- Click Assets - External Dependency Manager - iOS Resolver - Settings in the Unity top toolbar to open iOS Resolver Settings.
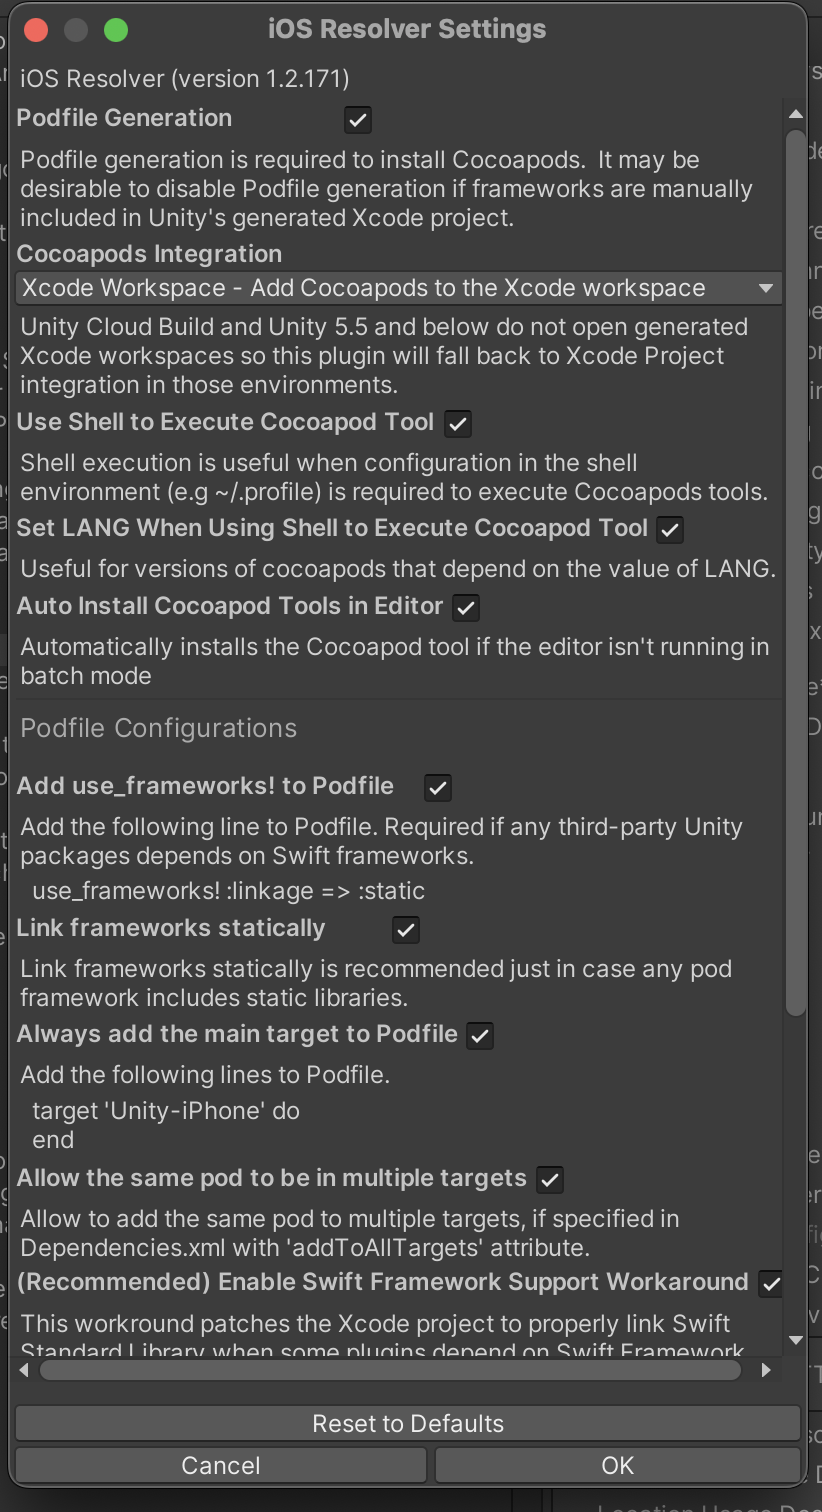
- Things to look at here:
- Podfile Generation: Option required to install Cocoapods. Think of Cocoapods as a dependency management tool that helps manage external libraries easily. Enabling this is recommended.
- Cocoapods Integration: Option to check whether the Xcode project generated after Unity build will be
xcprojorxcworkspace.xcworkspaceis recommended.
- This covers most of the GUI option settings. Next, let’s look at the Xcode project structure and build post-processing scripts.
About Xcode Project xcworkspace Structure
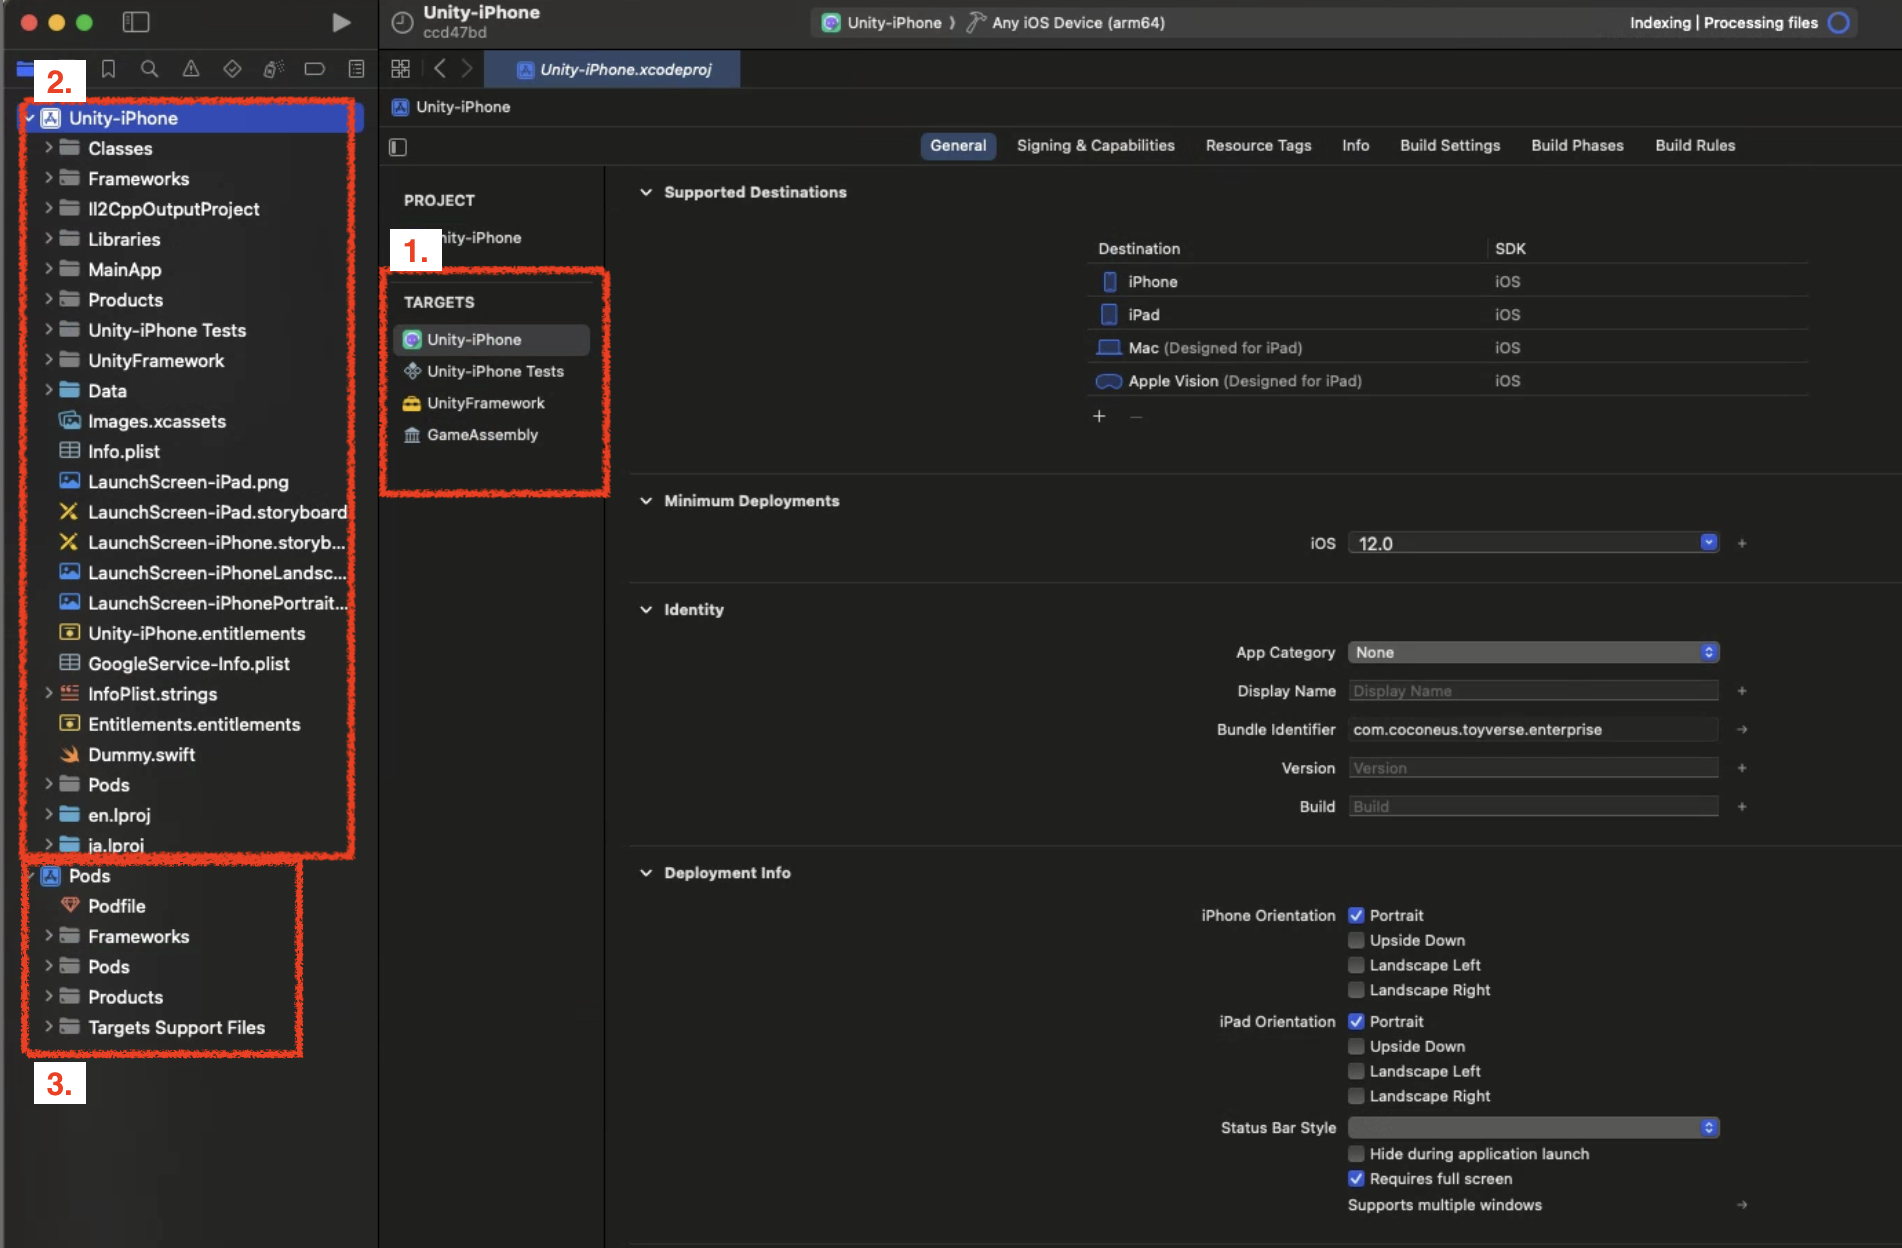
1. Project Target
- A Target specifies a Product to build and contains information (Build Settings, Build Phases) for building the Product from files within the workspace.
- Especially for Unity projects, the following three Targets are important: Unity-iPhone, UnityFramework, GameAssembly.
- Unity-iPhone is the scene launcher part of the target. It includes the MainApp folder, launch screens, .xib files, icons, data, and app display data like /Info.plist files, and it executes the library. The Unity-iPhone target has a single dependency (Implicit Dependency) on the UnityFramework target.
- Single dependency simply means that to build Unity-iPhone, the UnityFramework target is required. If they exist in the same workspace, the build proceeds in dependency order: GameAssembly -> UnityFramework -> Unity-iPhone.
- UnityFramework target is a library. It includes Classes, UnityFramework, Libraries folders, and dependent frameworks. Xcode uses this folder to build the
UnityFramework.frameworkfile.
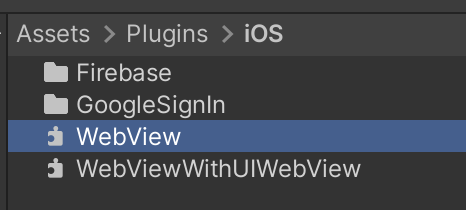
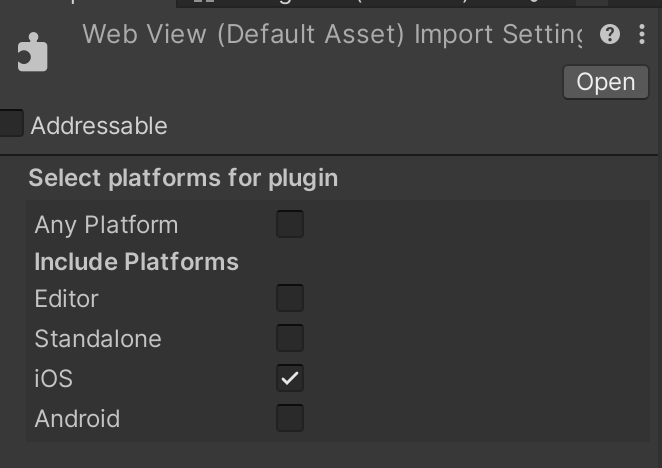
- In particular, this target includes plugin files checked for the iOS platform among the Plugin files inside the Unity project (e.g., Firebase, Google Protobuf, WebView…).
- Therefore, if you leave unused plugins in the project or if there are duplicate classes/naming between third-party plugins, the build will fail.
- So, you need to manage deleted plugins well and carefully select the plugins to use.
- GameAssembly is a container that converts C# code to C++ code. It uses the IL2CPP tool included in Unity and generates the following builds:
libGameAssembly.a: A static library containing all managed code of the project, cross-compiled to C++ and built for iOS.il2cpp.a: A static library containing IL2CPP runtime code to support managed code.
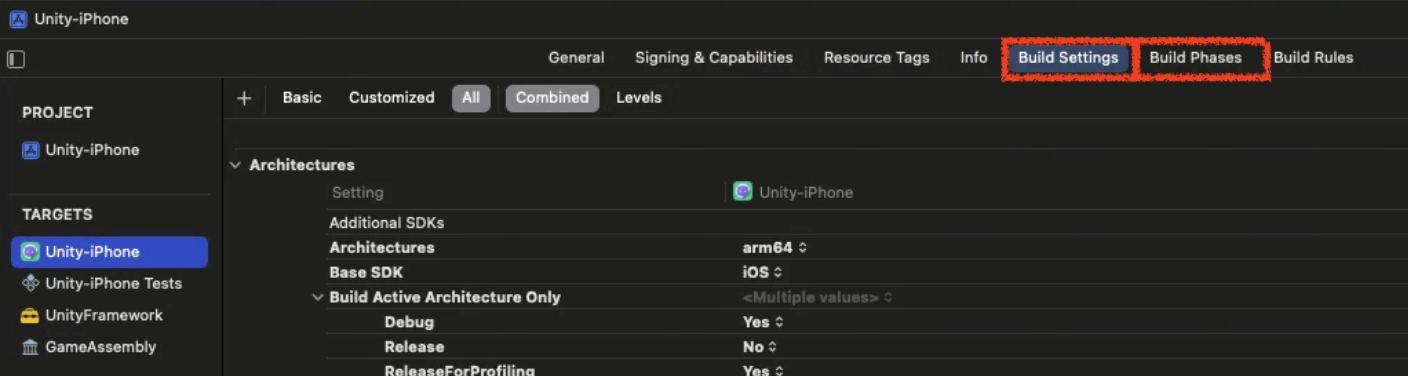
- Target Settings Toolbar

- General: Configure supported devices, OS versions, display names, version settings, dependencies, etc.
- Signing & Capabilities: Configure Certificate-related settings, Bundle Identifier, and Team ID. You can also enable Apple services (CloudKit, Game Center, In-App Purchase).
- Resource Tags: Manage tag strings for On-Demand Resources. This structure allows large resources to be downloaded later instead of being bundled with the app.
- Info: Check
Info.plist. - Build Settings: Decide CPU architecture types, crash logs, and whether to generate dSYM files required for Instruments debugging.
- Build Phases: There are also features like this! Check the reference blog
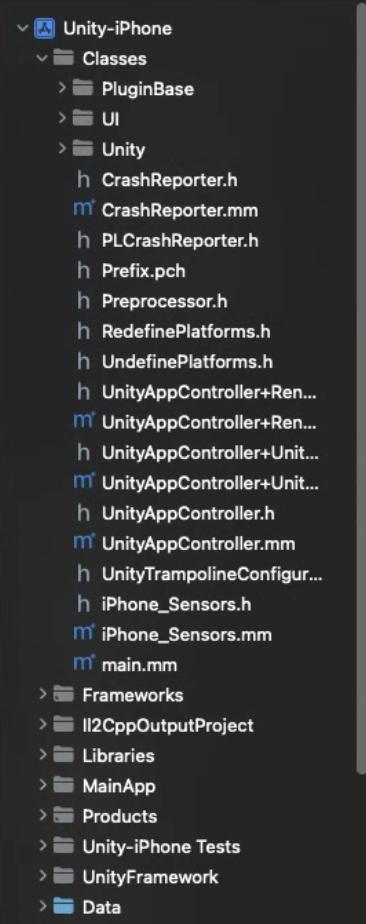
2. Classes Folder
- Contains code integrating Unity runtime and Objective-C.
3. Data Folder
- Stores the application’s serialized assets and .NET assemblies (.dll, .dat files) as full code or metadata depending on Code Stripping settings.
- Refer to Unity Official Docs for details
4. Libraries Folder
- Contains the
libli2cpp.afile for IL2CPP.
5. Info.plist File
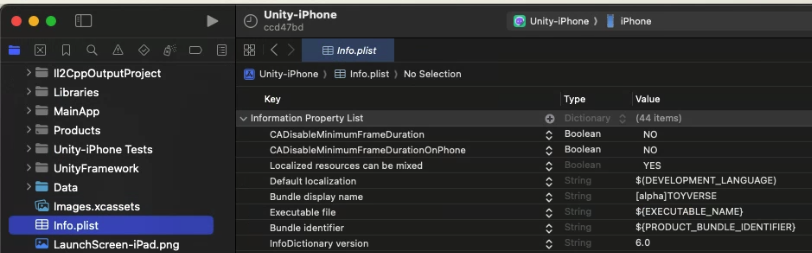
- Info.plist stands for Information Property List. It is a configuration file containing basic information about the iPhone application.
- Stores Bundle Identifier and app software info in XML format.
- ATT popup text is also handled via the
Info.plistfile. - Background settings like Remote Notification can also be configured here.
- Modifying
Info.plistsettings/content will be covered in the PostProcessBuild Script section later.
Unity iOS Build Post-processing Script & Xcode Configuration Automation
- Automation of Xcode project settings is possible through: Unity Project Build -> Xcode Project Generation -> Build Post-processing Script.
- As seen in the Unity Build Pipeline explanation, manually configuring various settings in an Xcode project has significant limitations. Therefore, to build the project smoothly, it is necessary to apply automation using the Unity
PostProcessBuildscript.
How to use PostProcessBuild
- Build-related scripts must be placed under the Editor folder in the project.

- For project building, refer to the Unity Build Pipeline link above.
- To use
PostProcessBuild, there are two ways: using only thePostProcessBuildAttribute or inheriting the Callback Interface. - To ensure processing after the build process is completely finished and to reliably receive callbacks, inheriting the
IPostprocessBuildWithReportinterface is recommended. - Here, I will explain the interface method to establish the process.
- Create a class inheriting the
IPostprocessBuildWithReportinterface.
1
2
3
4
5
6
7
8
9
10
11
12
13
14
15
#if UNITY_IPHONE
// iOS-specific preprocessing is mandatory

class PBR : IPostprocessBuildWithReport // Build Post-processing Interface
{
    public void OnPostprocessBuild(BuildReport report)
    {
        if (report.summary.platform == BuildTarget.iOS)
        {

        }
    }
}

#endif
- Execute it after the build pipeline is completed inside the function that builds the Unity project in batchmode (here,
BuildIos).
1
2
3
4
5
6
7
8
9
10
11
12
13
14
15
16
17
18
19
20
21
22
23
24
25
26
27
28
29
30
31
32
33
34
35
36
37
38
39
40
41
42
public static void BuildIos(int addsBuildNum, string xcodePath)
{
    string[] args = System.Environment.GetCommandLineArgs();
    int buildNum = 0;
    foreach (string a in args)
    {
        if (a.StartsWith("build_num"))
        {
            var arr = a.Split(":");
            if (arr.Length == 2)
            {
                int.TryParse(arr[1], out buildNum);
            }
        }
    }
    buildNum += addsBuildNum;

    System.IO.File.WriteAllText(ZString.Concat(Application.streamingAssetsPath, "/BuildNum.txt"), buildNum.ToString());

    PlayerSettings.SplashScreen.showUnityLogo = false;

    var test = System.IO.File.ReadAllText(ZString.Concat(Application.streamingAssetsPath, "/BuildNum.txt"));
    Debug.Log($"revised build num text is : {test}");

    PlayerSettings.iOS.buildNumber = buildNum.ToString();

    BuildPlayerOptions buildPlayerOptions = new BuildPlayerOptions();
    buildPlayerOptions.scenes = FindEnabledEditorScenes();
    buildPlayerOptions.locationPathName = xcodePath;
    buildPlayerOptions.target = BuildTarget.iOS;

    var report = BuildPipeline.BuildPlayer(buildPlayerOptions);

    if (report.summary.result == UnityEditor.Build.Reporting.BuildResult.Succeeded) Debug.Log("Build Success");
    if (report.summary.result == UnityEditor.Build.Reporting.BuildResult.Failed) Debug.Log("Build Failed");

    // PostProcessBuild runs after the batchmode Unity project build is completely finished.
#if UNITY_IPHONE
    PBR pbr = new PBR();
    pbr.OnPostprocessBuild(report);
#endif
}
- Now let’s look at the post-processing for rewriting the Xcode project file via
PBXProjectinside theOnPostprocessBuildfunction.
What is PBXProject?
To rewrite the contents of the Xcode project file generated during the Unity build pipeline stage, you must use the Xcode-specific API called PBXProject.
- First, put the xcode project path into a local variable and dynamically allocate
PBXProject. - Then, you can handle various Xcode settings in this
PBXProject. - Specifically, you can decide whether to bring the
Unity-iPhonemain target or theUnityFrameworktarget viaGetUnityMainTargetGuid.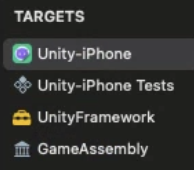
1
2
var frameTargetGuid = project.GetUnityFrameworkTargetGuid();
var mainTargetGuid = project.GetUnityMainTargetGuid();
- Don’t forget to write
WriteToFileat the end when all settings are done.
- Full Example Code
1
2
3
4
5
6
7
8
9
10
11
12
13
14
15
16
17
18
19
20
21
22
23
24
25
26
27
28
29
30
31
32
33
34
35
36
37
38
39
40
41
42
43
public void OnPostprocessBuild(BuildReport report)
{
    if (report.summary.platform == BuildTarget.iOS)
    {
        Debug.Log("OnPostProceeBuild");
        string projectPath = report.summary.outputPath + "/Unity-iPhone.xcodeproj/project.pbxproj";
        var entitlementFilePath = "Entitlements.entitlements";
        var project = new PBXProject();

        project.ReadFromFile(projectPath);

        var manager = new ProjectCapabilityManager(projectPath, entitlementFilePath, null, project.GetUnityMainTargetGuid());
        manager.AddPushNotifications(true);
        manager.AddAssociatedDomains(new string[] { "applinks:nkmb.adj.st" });// Universal-Link Support.
        manager.WriteToFile();

        var mainTargetGuid = project.GetUnityMainTargetGuid();
        project.SetBuildProperty(mainTargetGuid, "ENABLE_BITCODE", "NO");

        // Code temporarily added only for Enterprise.
        // Xcode build error occurs because Sign In With Apple Framework is not activated in Enterprise

        // Code to exclude iPad support in Supported Destinations
        // 1 means iPhone.
        //project.SetBuildProperty(mainTargetGuid, "TARGETED_DEVICE_FAMILY", "1"); // 1 corresponds to iPhone

        project.RemoveFrameworkFromProject(mainTargetGuid, "SIGN_IN_WITH_APPLE");
        project.SetBuildProperty(mainTargetGuid, "CODE_SIGN_ENTITLEMENTS", entitlementFilePath);

        foreach (var targetGuid in new[] { mainTargetGuid, project.GetUnityFrameworkTargetGuid() })
        {
            project.SetBuildProperty(targetGuid, "ALWAYS_EMBED_SWIFT_STANDARD_LIBRARIES", "No");

            project.SetBuildProperty(targetGuid, "LD_RUNPATH_SEARCH_PATHS", "$(inherited) /usr/lib/swift @executable_path/Frameworks");
            //project.AddBuildProperty(targetGuid, "LD_RUNPATH_SEARCH_PATHS", "/usr/lib/swift");
        }

        // test
        //project.RemoveFrameworkFromProject(mainTargetGuid, "UnityFramework.framework");
        project.SetBuildProperty(mainTargetGuid, "ALWAYS_EMBED_SWIFT_STANDARD_LIBRARIES", "No");
        project.WriteToFile(projectPath);
    }
}
- Example of using
frameworkTarget: Adding AppTrackingTransparency (ATT), AdSupport - Unity ATT Compliance, Apple ATT
- If tracking user behavior with Adjust, a popup warning text MUST be added.
- Adding popup text will be explained in the
Info.plistsection below.
1
2
3
var frameworkTargetGuid = project.GetUnityFrameworkTargetGuid();
project.AddFrameworkToProject(frameworkTargetGuid, "AppTrackingTransparency.framework", true);
project.AddFrameworkToProject(frameworkTargetGuid, "AdSupport.framework", true);
Entitlement
- Create a file named
Entitlements.entitlementsin the Xcode project by specifyingentitlementFilePath. - Create
ProjectCapabilityManagerto handle Push-Notification, Universal-Link, etc.
1
2
3
4
var manager = new ProjectCapabilityManager(projectPath, entitlementFilePath, null, project.GetUnityMainTargetGuid());
    manager.AddPushNotifications(true);
    manager.AddAssociatedDomains(new string[] { "applinks:nkmb.adj.st" });// Universal-Link Support.
    manager.WriteToFile();
PlistDocument - Editing Info.plist
- You can configure the ATT popup text, Localization, Remote-Notification for Firebase push notifications when the app goes to background, etc. mentioned above.
- To modify the
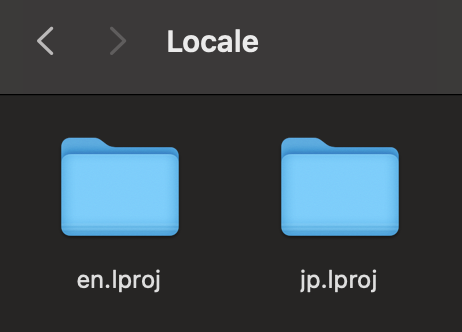
Info.plistfile, use the PlistDocument API likePBXProject. - For ATT popup text locales, create them inside the Unity project folder.
1
2
3
4
5
6
7
8
9
10
11
12
13
14
15
16
17
18
19
20
21
22
23
24
25
26
27
28
29
30
31
32
33
34
35
36
37
38
39
40
41
42
43
string infoPlistPath = pathToBuiltProject + "/Info.plist";
PlistDocument plistDoc = new PlistDocument();
plistDoc.ReadFromFile(infoPlistPath);
if (plistDoc.root != null)
{
plistDoc.root.SetBoolean("ITSAppUsesNonExemptEncryption", false);
var locale = new string[] { "en", "ja" };
var mainTargetGuid = project.GetUnityMainTargetGuid();
var array = plistDoc.root.CreateArray("CFBundleLocalizations");
foreach (var localization in locale)
{
array.AddString(localization);
}
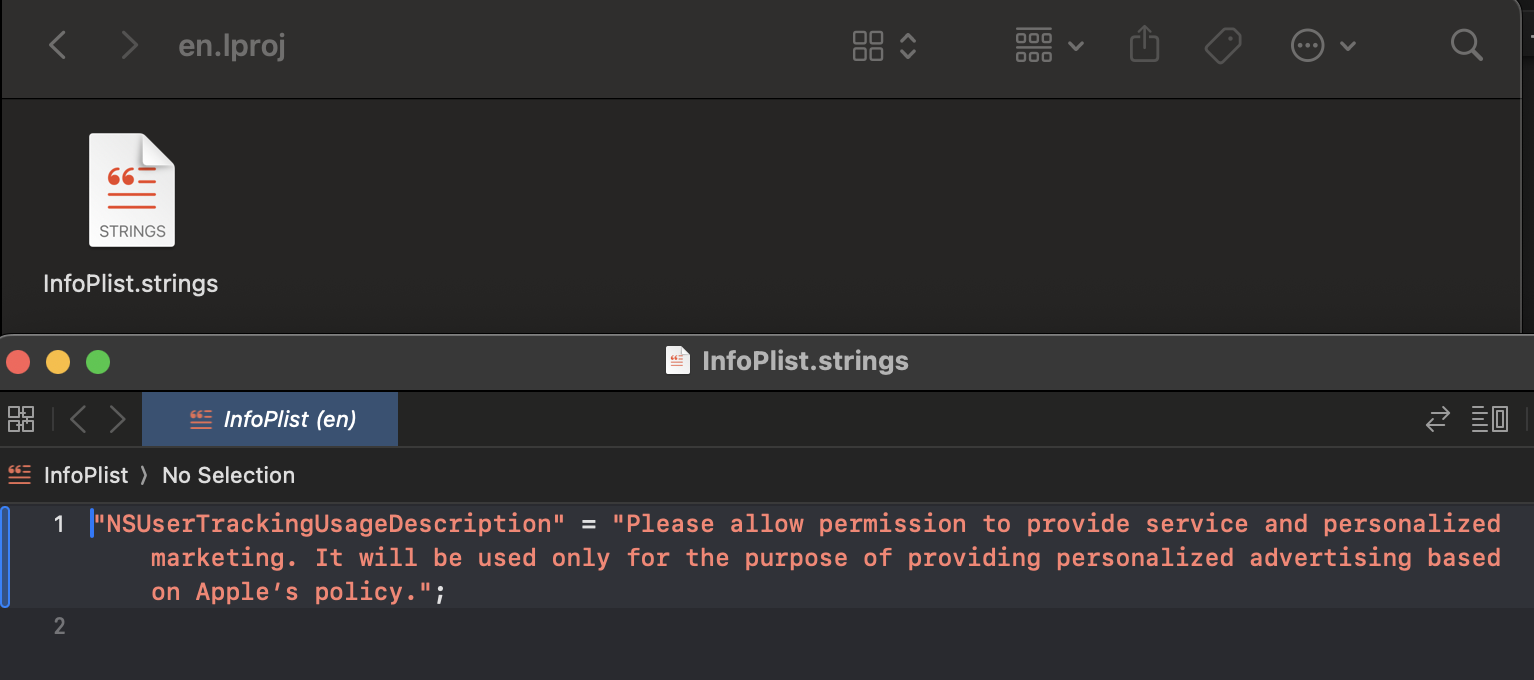
plistDoc.root.SetString("NSUserTrackingUsageDescription", "Please allow permission to provide service and personalized marketing. It will be used only for the purpose of providing personalized advertising based on Apple’s policy.");
plistDoc.WriteToFile(projectPath);
for (int i = 0; i < locale.Length; i++)
{
var guid = project.AddFolderReference(Application.dataPath + string.Format("/Editor/iOS/Localization/{0}.lproj", locale[i]), string.Format("{0}.lproj", locale[i]), PBXSourceTree.Source);
project.AddFileToBuild(mainTargetGuid, guid);
}
// Background mode setting required for Firebase usage
PlistElementArray backgroundModes;
if (plistDoc.root.values.ContainsKey("UIBackgroundModes"))
{
backgroundModes = plistDoc.root["UIBackgroundModes"].AsArray();
}
else
{
backgroundModes = plistDoc.root.CreateArray("UIBackgroundModes");
}
backgroundModes.AddString("remote-notification");
plistDoc.WriteToFile(infoPlistPath);
}
else
{
Debug.LogError("ERROR: Can't open " + infoPlistPath);
}
This post is licensed under CC BY 4.0 by the author.